

Hier geht's zur deutschen Version.
Did you miss Part 1? Read it here.
So here's part 2 of our little series about dog potography hacks.
4. Is there a tree growing out of your head?! Or disturbing picture elements
So, you found a nice location, your dog looks beautifully into the camera and the light is perfect. But later, when you review your picture on a bigger screen (for example on your computer) you notice that there’s an ugly plastic bag in the scenic landscape. Or you have placed your dog in an unfavorable spot where it looks as if a twig is growing right out of his ear. Or there’s a blade of grass going right across his eye or… You get the picture.
This is annoying and doesn’t have to happen. Of course you can save such a picture in times of Photoshop and co. afterwards but often it’s time-consuming and maybe you don’t want to work with editing at all. So the best way to avoid this is to look out for any disturbing elements right when you take the pictures. Over time you will train your eye to see them better. And don’t hesitate to shape your environment a bit to your liking. Trash or twigs can be removed easily. I even rip out grass blades occasionally if they are in the way.

The grass in the front part of the pictures is too distracting for my taste. Don’t hesitate to shape the environment to your liking in those cases.

Without the grass the picture feels calmer and the observer’s gaze is directed more to the dog.
5. Strip! Or take off harnesses and collars
You don’t have to strip, of course, but your dog should. I personally prefer if the dog wears nothing but fur. But that is a matter of taste. Some dog parents also like their dog to wear beautiful collars or bandanas for the picture and that’s totally okay, of course. Important is that you make the conscious choice to do so. A forgotten maybe even lopsided harness never looks good. But what’s also important is: safety first! If your dog doesn’t know how to safely sit and stay or has a strong hunting instinct the leash stays on, of course! If this is the case, you can either remove the leash afterwards in an editing program (it’s easiest if you use a thin black check cord or rope leash) or you incorporate the leash creatively into the picture, for example by choosing a matching color or by draping it in a nice swing over the next tree.
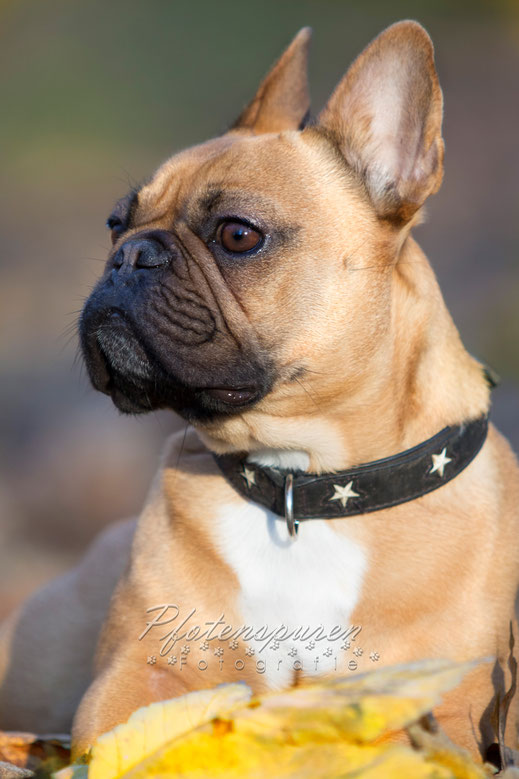
Bulldog Malia looks pretty in her collar.

The same picture without the collar. I personally prefer this one. Do you? Make the conscious decision if you want your dog to wear a collar or not.
6. Taking photographs is painting with light
Without light, no picture. It’s as easy as that. A picture is created because we control, with the help of technology, how much light touches the sensor of our camera. But it isn’t always that easy after all. Because there is not the light but there’s sunlight, morning light, evening light, artificial light… But the “right” light is essential for a good picture. But what is the “right” light for dog photography?
Intuitively many people think that bright sunshine is the best light for taking pictures because it is bright enough and allows the colors to glow. But that is exactly not the case. When the sun is high in the sky, white patches of fur are often overexposed and the dog’s eyes look like expressionless black holes. Scary. That is because blazing sun creates harsh shadows. If you look at your own shadow during midday you can see that it is deep black but if you look at it during morning or evening hours it is grey and therefore “softer”. Consequently, the best time for taking pictures is when the sun is low, in the morning or the evening. A cloudy sky also helps to soften the light. The light is especially beautiful during the blue hour right after sunrise and during the golden hour right before sunset.
Very important is also the position of your dog in relation to the sun. You should always take your pictures with the sun in your back. This way the light shines into your dog’s face, brings out the color and creates reflexions in his eyes and makes them look more vivid.
If the light comes from one side, one half of the face is too dark and shadows “drown”. If the light is behind your dog you get a backlight shot. You can, of course, use backlight for artistic effects but you’ll obviously get a completely different picture.
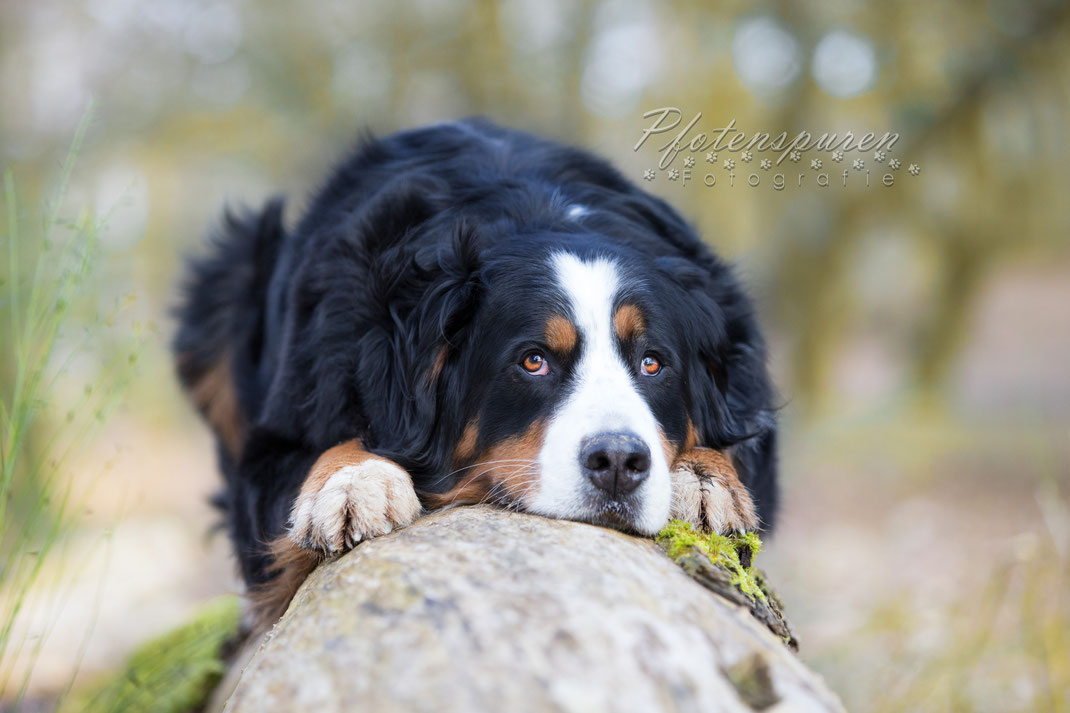
Soft light like this on a morning in early march with the sun behind the photographer brings out the color and creates reflexions in the eyes.
7. The blurred background
People often ask me how you get those pictures in which the dog is nice and sharp but the background blurred. The effect is nice because it shifts the focus of the picture to the dog and makes him stand out more against the background. Simply put, the so called depth of field is controlled by the correlation of focal length and aperture. The wider the aperture and the longer the focal length the more blurred the background. I always work in the manual mode of my camera where I can set aperture, shutter speed and ISO myself. But in this series I want to show you how to create certain effects without a deeper technical understanding or expensive equipment.

Canon EOS 6D Mark II, Canon EF 70-200mm; 200 mm, f/2.8, 1/1000
A wide aperture and a long focal length create this blurred background.
If you use a lens with variable focal length put it to the maximum focal length that means, zoom in as much as you can. Place your dog far away from the background. For example, don’t let him sit right in front of a wall but several feet away from it. The further the dog is away from the wall the blurrier the background will get. Now you get as close to your dog as possible. The closer you get to your dog with your camera the blurrier the background will be. This even works with some smartphones.
Speaking of smartphones – a lot of manufacturers have recognized their customer’s wish for pictures with blurry backgrounds. For example, since iPhone 7 Apple has included the portrait function in their camera. If you use the portrait function on your smartphone and also follow the other advice above you will already get a decent result.

The portrait mode of the iPhone 7 Plus.

The result of the picture on the left. Taken with the iPhone 7 Plus in the portrait mode.

Taken with the iPhone 7 Plus in portrait mode.
Some cameras also offer semi-automatic modes. Those allow you to manipulate exactly one factor manually while everything else is still adjusted automatically. There’s also an automatic aperture control. You can set the aperture manually, shutter speed and ISO chooses the camera for you. Canon calls this mode “AV”. Choose the corresponding mode on your camera and open the shutter as wide as you can. That means you set it to the smallest number. That can be a bit confusing at first – just remember, the smaller the number the wider the shutter. For example, f 2.8 is smaller than f 5.6, so the shutter is opened wider in the first case. Depending on which lens you use you will be able to open the shutter more or less wide. The wider you can open it the blurrier the background will be.

Automatic aperture control on a Canon 6D Mark II.
By the way: It doesn’t always make sense to aim for a shallow depth of field. I often take pictures of my dog to show people where she goes and what places she visits. What’s the point in taking a picture of your dog in front of Neuschwanstein Castle if nobody recognizes that it’s Neuschwanstein Castle, right?
Read Part 1 here.